Painting a ceiling can be a difficult task, and one wrong move can quickly lead to a mess. Before beginning the project, it’s important to do the necessary preparation work to make sure that the painting job is done properly. This preparation can include ensuring that the surface is well-prepared, gathering the right tools and materials, and planning the order in which the painting should be done. Let’s take a look at the steps that can be taken to prepare the surface and keep it protected from mess.
How to paint a ceiling without making a mess
A key step in any painting project is preparing the room for the task at hand. Suppose you’re about to paint a ceiling — how do you ensure there won’t be any accidental spills or splatter? One of the safest decisions you can make is to move furniture out of the room entirely, or cover it with a protective cloth. This way, if any paint should happen to escape, it will land on cloth or hardwood floors that can be quickly wiped up instead of soaking into your couch cushions. Additionally, it is also wise to cover any light fixtures in the room which could potentially become stained if paint gets too close. Taking these precautionary measures will help avoid potential messes and ensure your final result looks great!
Cover floor and walls
There are several steps that can be taken to help protect your floor and walls from paint splatter. First, create a layer of protection by laying out a drop cloth on the floor or plastic sheeting on the wall. Ensure that there are no gaps between the edges of the cloth or sheet where paint may get through. If working on a wall, apply painter’s masking tape to create a border around the area that needs to be painted. Once the tape has been applied properly, any excess droplets will remain on the tape instead of creating a mess on your floor or walls. It is important to note that it will take some patience and precision when applying painter’s masking tape in order to achieve an effective barrier.
Identify any cracks or holes
Before completing any work that could cause damage to your ceiling, it’s important to identify any cracks or holes in the surface. Inspect the entire ceiling, gently running your hand over the surface to search for unexposed flaws. Make sure to double check by tapping the ceiling with a hammer—any hollow sound indicates an underlying issue.
Once these issues have been found, carefully mark each affected area with chalk or another type of removal marking tool. After noting where any potential damage could occur, move on to inspecting the next step—the surroundings of the work area.
Keep in mind this is only a starting point when identifying and assessing risks associated with drywall and other ceiling material installation projects. Additional steps may include inspecting wiring and ensuring conditioned air circulation vents do not interfere with structural integrity before beginning a project.
Painting
Painting your ceiling can be a tedious job that requires precision and concentration. It also often results in messes, so knowing how to paint a ceiling without making a mess can be a skill worth learning. In this article, we will discuss some tips for avoiding a messy ceiling when painting. Let’s begin!
Choose the right paint
When painting your ceiling it’s important to choose the right type of paint. Latex paints tend to be easier to work with, and most latex paints can also provide protection against mold. They also dry quickly and can often be applied in a single coat. However, if you are redoing an older ceiling, it is best to use an oil-based enamel paint for a lasting finish.
It’s also important to consider choosing a flat finish. While semi-gloss is more paint resistant, a flat finish is more forgiving when mistakes are made. With flat finishes, dust and dirt won’t show up as much either, making your clean up easier down the line if you make any slip ups while painting your ceiling!
Finally, always take into account the amount of coverage you get when deciding on the type of paint to purchase. High-hiding acrylics offer excellent coverage compared to old-fashioned alkyds and latex paints can be blended together with ease where repair jobs are needed or when matching an existing shade exactly is crucial. In any case its best practice to read up on or ask an employee when purchasing paint at your local store for tips on which type of paint is best suited for your project!
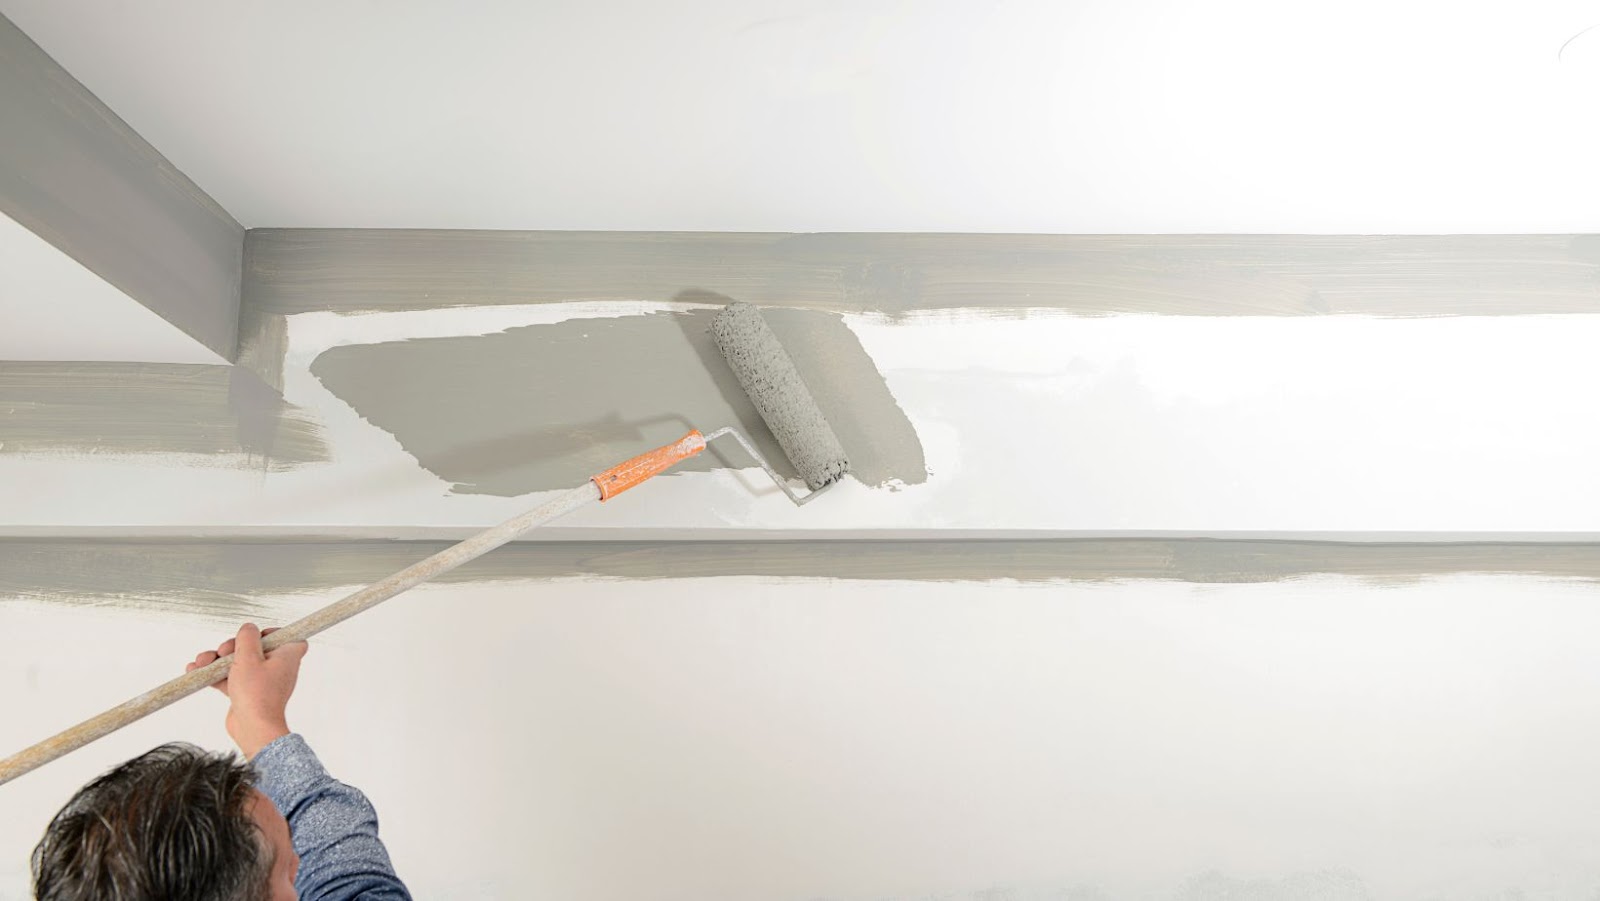
Use a roller with a long handle
Painting a ceiling can be a real challenge, especially if you need to climb a ladder to reach it. Fortunately, there are some simple tips and tricks that you can use to keep the area clean while painting and also reduce your overall effort.
One of the most important tips is to use a roller with a long handle so that you do not need to climb up and down the ladder or reach onto your toes while painting. This will ensure that the closest part of your body is far away from any potential dripping paint so that you remain clean throughout the process. A long handle roller also allows you to maintain good control during the entire painting process, leading to better results overall.
Using quality painting supplies such as good quality rollers and brushes will help reduce messy situations occurring around baseboards and corners where colors collide. Make sure each wall section is thoroughly covered with an even coat of paint for smooth transitions between colors, especially for two-tone walls. The key here is being organized before beginning a project like this so that each wall section is clearly defined in its coloration before starting.
Once you’ve taken these necessary steps, it’s important to closely inspect each wall section when finished in order to recognize any drips or imperfections that may have occurred during the process. If spotted immediately after painting, these can be easily kept at bay by quickly wiping them away with a damp cloth or minor touch ups before they dry into noticeable blemishes on the walls or ceiling. In this way, messy ceilings can be avoided all together by taking necessary precautions when undertaking any Paint jobs!
Paint in sections
Painting in sections is an efficient way to achieve a professional-looking finish. The major sections to consider when applying paint are walls and trim, ceilings, and window and/or door frames. It is essential to paint these sections in the proper order to ensure a smooth, uniform look when you’re finished.
When tackling a painting project, start by painting the walls first. This will allow the walls to be mostly dry before windows and door frames are painted. As for ceiling painting, make sure you start at the edges of the room first and work your way towards the center so that your hands do not accidentally brush against freshly painted areas.
Next, apply paint to any window frames or door jams using brush strokes that go with the grain of wood for a flawless surface. Finally, if you are working on interior walls near windows or doors where two colors meet (such as around rails), use painter’s tape applied correctly along with cutting in techniques for clean lines around baseboards (molding) or crown moldings that separate different colors or finishes.
By keeping this sequence in mind while painting a room section by section you can ensure that no step is forgotten while saving time!
Clean Up
Painting a ceiling without making a mess takes some preparation and practice. It is important to take the time to get everything ready and know the proper techniques for painting. Fortunately, there are some tips and tricks that can make the process easier and help you create a beautiful, clean ceiling. In this article, we will discuss the best ways to prepare and execute a mess-free painting project.
Clean up paint spills immediately
One of the most important tips for avoiding a messy ceiling is to clean up paint spills as soon as they happen. Paint spills create a mess that is difficult and time consuming to fix, so it’s important to react quickly and blot up any spills before they spread any further. When painting with a brush or roller, keep a damp cloth handy so you can quickly blot away any excess paint. If you’re working with a spray can, keep the nozzle pointed downward so that any drips go on the ground instead of onto your ceiling. Be careful not to rub too hard when trying to remove paint stains, as this can cause more harm than good by damaging the ceiling surface underneath.
Clean the roller and brush
Cleaning the roller or brush is an important step that should not be skipped during your painting job. When using a roller, be sure to rinse it as often as necessary in order to keep the paint layer even and avoid leaving excess material on the ceiling. Many types of roller covers can be used multiple times, however it’s best to discard them after a few uses in order to maintain an even surface.
Brushes should also be cleaned between coats and stored properly when not in use. Residual paint on a brush will start to dry if left out overnight, so it is important to immediately clean brushes off with warm water and detergent. Once they are fully dry, store them upright with the bristles facing down to make them last longer and get more uses out of them. Keeping tools clean is essential for achieving smooth results that last for years.
Remove tape and plastic
When tackling a large home improvement project such as painting the ceiling, it’s important to remember that there are steps you must take to make sure your ceiling is clean and free of debris. Start by removing sticky tape, plastic and other objects that might already be attached to the ceiling. If the tapeworm is old and sticking out, use wooden sticks or a putty knife to carefully remove it.
If you’re dealing with loose insulation, fiberglass or other particles on your ceiling, use a damp cloth and a vacuum cleaner with an upholstery attachment to suck them off. Wearing safety gear such as goggles and thick gloves to keep yourself safe from flying debris is essential when removing these items from your ceiling.
When using an adhesive spray on the ceiling for fragile items like wallpaper, make sure you don’t leave too much spray around the area. If you do, wipe off any overspray with a damp cloth immediately after applying the adhesive spray. It is also important that you use proper ventilation while doing this step because the fumes can be toxic if inhaled directly or over prolonged periods of time. Follow all safety instructions provided with any products used in this process as well.
Once all objects are removed from your ceilings, it’s time for cleaning – apply gentle soapy water using either a damp mop or soft cloths depending on what works best for your need and surface area that needs cleaning .It’s important not to use harsh cleaners which can damage the paint on your ceiling .Allow to dry fully before starting any further work on your ceiling .
Maintenance
Painting a ceiling is a particularly tricky task as it requires a steady hand and a good eye. It can be easy to make a mess and end up with a result that you didn’t intend. But if you follow some simple steps, you can paint your ceiling without making a mess. In this article, we will explore some tips and tricks to help you avoid a messy ceiling.
Check for any cracks or holes
It is important to check for any cracks or holes on the ceiling, as these can become entry points for water and cause leaks in certain weather conditions. Inspecting walls and ceilings regularly can help you spot any damage before it becomes too serious. Additionally, it is important to properly seal cracks and holes big enough so that water cannot seep through. This is especially true for roofs – make sure you have an experienced roofer inspect your roof regularly so that you can prevent any water damage from occurring. If you spot some damage, act quickly and repair the problem as soon as possible – otherwise, further problems might arise down the line.
Check for signs of peeling or blistering
In order to protect your home from further damage and avoid costly repairs, it is important to regularly check for signs of peeling or blistering paint. In some cases, these signs can be hard to identify as they may not be visible from a distance. Examine any painted surfaces closely in order to look for any peeling that has already occurred. If the edges of the paint chips are curled or bubbled up, then this could indicate that there is existing water damage underneath and proper maintenance should be taken immediately in order to prevent further problems from occurring. Furthermore, it is important to address any issues with flaking and chalky surfaces as this could indicate poor coating application or improper preparation prior to painting. Identify any and all issues before applying a fresh coat of paint in order for the new coat to properly adhere and last longer.
Repaint as needed
A ceiling that has loose or peeling paint should be professionally resolved. The display of large, unsightly bubbles is not just a turnoff to guests, but an indication of water damage or the use of improper paint and primers. If you have those issues in your home, contact a professional painter and have them address the issue immediately.
Your ceiling needs to receive special attention because it serves as a protective barrier for your interiors from outside elements such as wind and rain. When properly sealed, your paint can also help reduce energy costs by reflecting heat and cooling applications back into the room. Spending time inspecting for damage every few months will help prevent costly repairs in the future.
Repainting your home’s ceiling is an affordable way to update the look of a room while ensuring your family has a safe environment in which to live. Before you begin any repainting project, consider these tips:
• Examine the surface carefully to determine if there are any cracks or abrasions which may require caulk or spackle before painting can begin
• Ensure all walls and ceilings are thoroughly cleaned with soap and water prior to painting
• Make sure all areas where colors may meet have been sanded down for uniformity
• Prime bare drywall prior to painting
• Follow manufacturer’s instructions when selecting paint sheen; usually flat latex is preferred
• Ask about low-VOC (volatile organic compounds) paints which minimize off-gassing pollutants yet provide excellent coverage
• Don’t forget to cover furniture and floors using drop cloths or plastic sheeting
• Take appropriate safety precautions when applying any type of ceiling treatment